7 minutes
Setting Up a Ludus Server
A couple weeks ago, I was looking for some ways to progress my Active Directory skillset as I was preparing for the OSCP exam. I came to learn that one very popular way to improve AD pentesting skills is by attacking the Game of Active Directory (GOAD). This project is a very cool AD setup that is inspired from Game of Thrones and is just riddled with security vulnerabilities to start attacking.
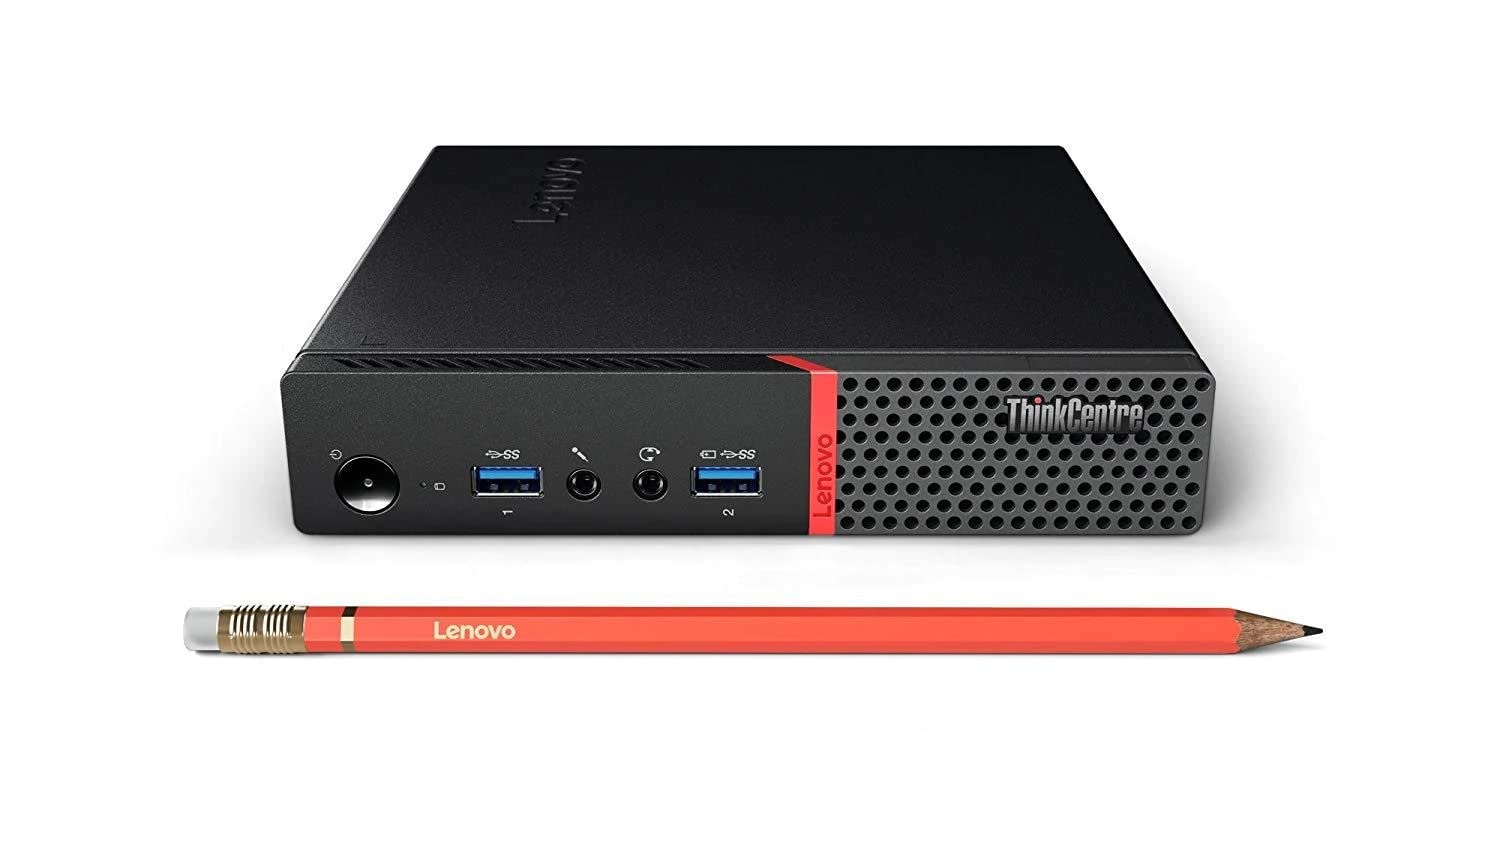
I was trying to find the best way to stand up this very resource-intensive environment, and I came across the Ludus project. On the first page of their documentation it says “90 percent of security research is getting test environments setup properly”, and I was quickly learning this myself. Ludus looks to solve this problem through the use of declartive cyber range configuration, all powered by Ansible. Seeing as I already have some prior experience working with Ansible, I thought this would be a great way to introduce myself to homelabbing (is that a word?). Ludus was also created by CISA, which surprised me! I read the system requirements to run a Ludus server and picked up a Lenovo M900 Tiny off of Ebay.

After receiving it in the mail, and promptly removing any trace of Windows, I installed Debain 12 — as recommended in the Ludus documentation. From there I went through the standard installation steps and set up my Ludus admin account.
root@ludus:~# ludus-install-status
Ludus install completed successfully
Root API key: <SNIP>
root@ludus:~# exit
logout
burt@ludus:~$ LUDUS_API_KEY='<SNIP>' ludus user add --name 'Ludus Admin' --userid admin --admin --url https://127.0.0.1:8081
[INFO]  Adding user to Ludus, this can take up to a minute. Please wait.
+--------+------------------+-------+------------------------------------------------+
| USERID | PROXMOX USERNAME | ADMIN |                    API KEY                     |
+--------+------------------+-------+------------------------------------------------+
| admin  | ludus-admin      | true  | <SNIP>                                         |
+--------+------------------+-------+------------------------------------------------+
burt@ludus:~$ export LUDUS_API_KEY='<SNIP>'
burt@ludus:~$ ludus user creds get
+------------------+----------------------+
| PROXMOX USERNAME |   PROXMOX PASSWORD   |
+------------------+----------------------+
| ludus-admin      | <SNIP>               |
+------------------+----------------------+
The awesome thing about Ludus is that it knows where to find all the common ISOs you need, as well as how to automatically configure them. At the end of the installation steps all of these systems are at your fingertips and ready to be used. All we have to do is build them.
burt@ludus:~$ ludus template list
+------------------------------------+-------+
|              TEMPLATE              | BUILT |
+------------------------------------+-------+
| debian-11-x64-server-template      | FALSE |
| debian-12-x64-server-template      | FALSE |
| kali-x64-desktop-template          | FALSE |
| win11-22h2-x64-enterprise-template | FALSE |
| win2022-server-x64-template        | FALSE |
+------------------------------------+-------+
burt@ludus:~$ ludus templates build
[INFO]  Template building started - this will take a while. Building 1 template(s) at a time.
burt@ludus:~$ ludus templates logs -f
2024/11/26 13:09:54 ui: ==> proxmox-iso.debian11: Retrieving ISO
2024/11/26 13:09:54 ui: ==> proxmox-iso.debian11: Trying https://cdimage.debian.org/cdimage/archive/11.7.0/amd64/iso-cd/debian-11.7.0-amd64-netinst.iso
2024/11/26 13:09:54 ui: ==> proxmox-iso.debian11: Trying https://cdimage.debian.org/cdimage/archive/11.7.0/amd64/iso-cd/debian-11.7.0-amd64-netinst.iso?checksum=sha512%3A4460ef6470f6d8ae193c268e213d33a6a5a0da90c2d30c1024784faa4e4473f0c9b546a41e2d34c43fbbd43542ae4fb93cfd5cb6ac9b88a476f1a6877c478674
2024/11/26 13:10:10 ui: ==> proxmox-iso.debian11: https://cdimage.debian.org/cdimage/archive/11.7.0/amd64/iso-cd/debian-11.7.0-amd64-netinst.iso?checksum=sha512%3A4460ef6470f6d8ae193c268e213d33a6a5a0da90c2d30c1024784faa4e4473f0c9b546a41e2d34c43fbbd43542ae4fb93cfd5cb6ac9b88a476f1a6877c478674 => /opt/ludus/users/ludus-admin/packer/packer_cache/a412a061c3a3789c3bdcb9dd2db61007b7793fdd.iso
2024/11/26 13:10:13 ui: ==> proxmox-iso.debian11: Creating VM
2024/11/26 13:10:13 ui: ==> proxmox-iso.debian11: No VM ID given, getting next free from Proxmox
2024/11/26 13:10:17 ui: ==> proxmox-iso.debian11: Starting VM
⠦ Waiting for server...
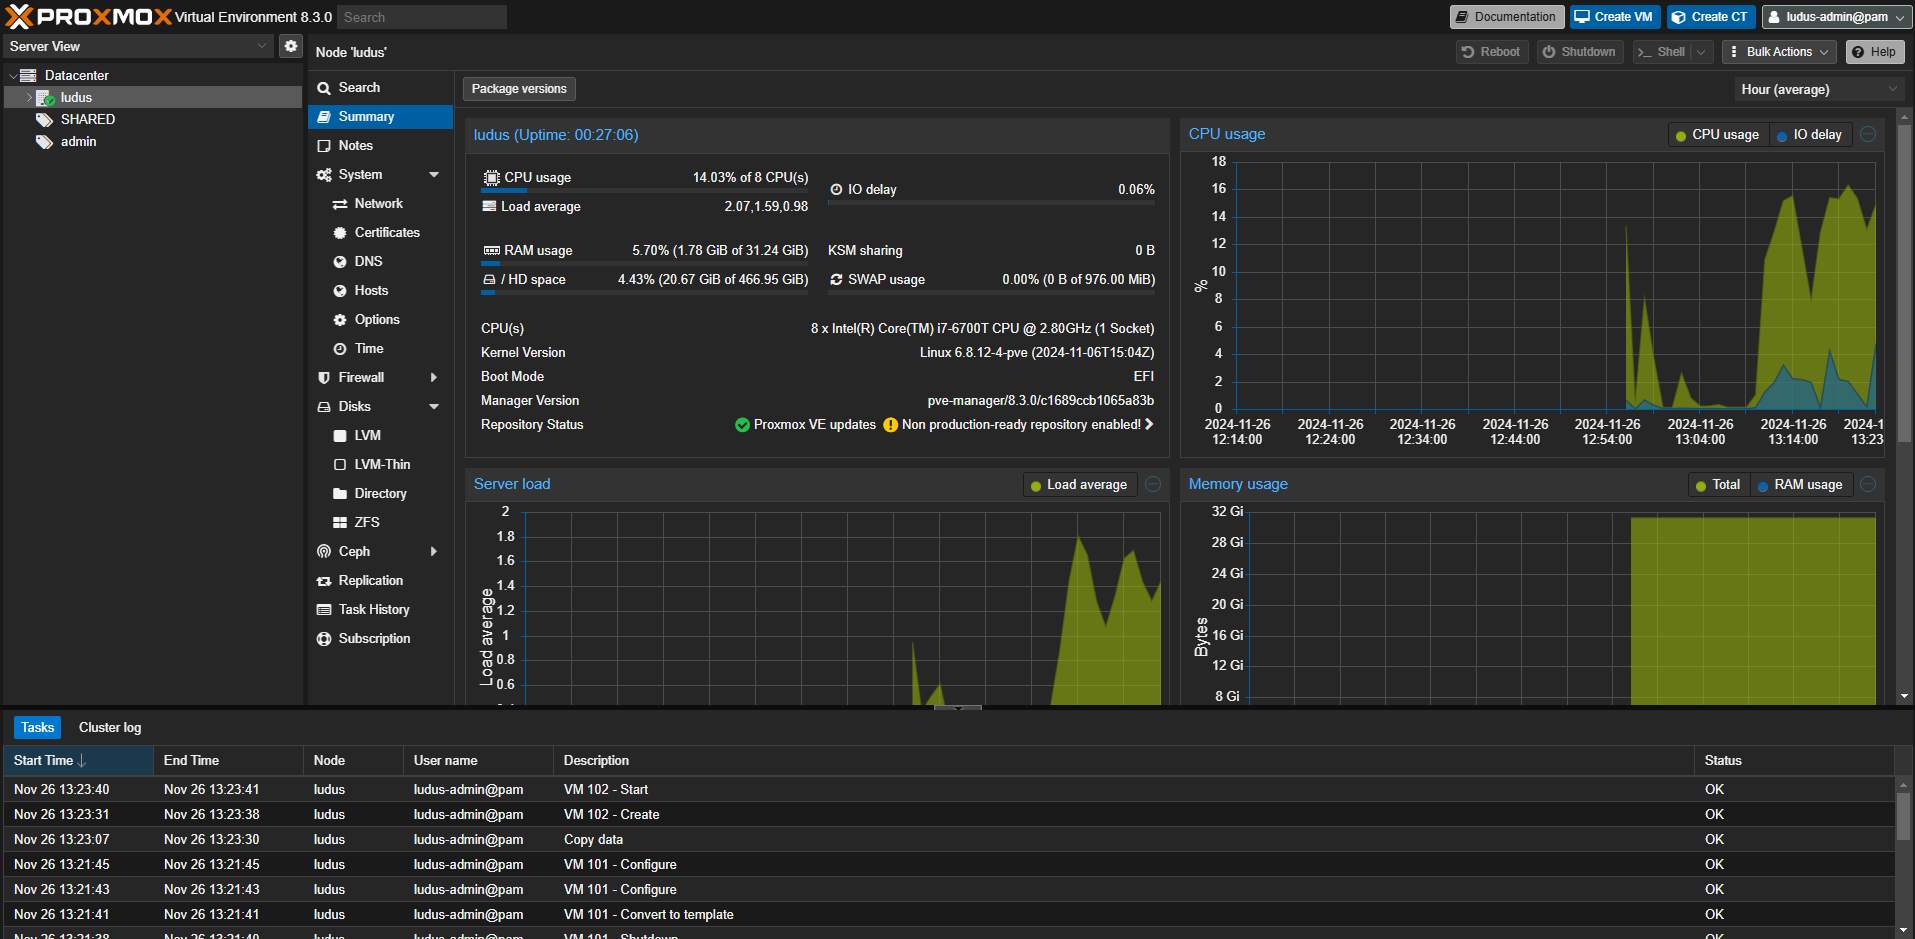
The project uses Proxmox under the hood, so we also get access to the Proxmox web UI which is set up to display the Ludus server logs as well.

=>================
=> Build complete!
=>================
burt@ludus:~$ ludus templates list
+------------------------------------+-------+
|              TEMPLATE              | BUILT |
+------------------------------------+-------+
| debian-11-x64-server-template      | TRUE  |
| debian-12-x64-server-template      | TRUE  |
| kali-x64-desktop-template          | TRUE  |
| win11-22h2-x64-enterprise-template | TRUE  |
| win2022-server-x64-template        | TRUE  |
+------------------------------------+-------+
burt@ludus:~$
Now that the server is ready to go, it’s time to deploy GOAD. Right on the sidebar of the Ludus documentation site exists setup steps for GOAD: https://docs.ludus.cloud/docs/environment-guides/goad/. Simply run a couple builds, kick off Ansible, and wait!
burt@ludus:~/ludus/templates$ ludus templates add -d win2016-server-x64
[INFO]  Successfully added template
burt@ludus:~/ludus/templates$ ludus templates add -d win2019-server-x64
[INFO]  Successfully added template
burt@ludus:~/ludus/templates$ ludus templates build
[INFO]  Template building started - this will take a while. Building 1 template(s) at a time.
burt@ludus:~/ludus/templates$ ludus templates logs -f
2024/11/26 15:03:28 ui: ==> proxmox-iso.win2016-server-x64: Retrieving ISO
2024/11/26 15:03:28 ui: ==> proxmox-iso.win2016-server-x64: Trying https://software-download.microsoft.com/download/pr/Windows_Server_2016_Datacenter_EVAL_en-us_14393_refresh.ISO
2024/11/26 15:03:28 ui: ==> proxmox-iso.win2016-server-x64: Trying https://software-download.microsoft.com/download/pr/Windows_Server_2016_Datacenter_EVAL_en-us_14393_refresh.ISO?checksum=md5%3A70721288bbcdfe3239d8f8c0fae55f1f
⠸ Waiting for server...
==> Wait completed after 25 minutes 48 seconds
==> Builds finished. The artifacts of successful builds are:
=>================
=> Build complete!
=>================
burt@ludus:~/ludus/templates$ ludus template list
+------------------------------------+-------+
|              TEMPLATE              | BUILT |
+------------------------------------+-------+
| debian-11-x64-server-template      | TRUE  |
| debian-12-x64-server-template      | TRUE  |
| kali-x64-desktop-template          | TRUE  |
| win11-22h2-x64-enterprise-template | TRUE  |
| win2022-server-x64-template        | TRUE  |
| win2016-server-x64-template        | TRUE  |
| win2019-server-x64-template        | TRUE  |
+------------------------------------+-------+
burt@ludus:~/ludus/templates$
The default settings of 2GB RAM and 2vcpu look like they’ll work in my case, so I’ll leave the given configuration file as-is.
burt@ludus:~/ludus$ ludus range config set -f config.yml
[INFO]  Your range config has been successfully updated.
burt@ludus:~/ludus$ ludus range deploy
[INFO]  Range deploy started
burt@ludus:~/ludus$ ludus range logs -f
<Ansible logs ...>
<Ansible logs ...>
<Ansible logs ...>
PLAY RECAP *********************************************************************
admin-GOAD-DC01            : ok=70   changed=26   unreachable=0    failed=0    skipped=49   rescued=0    ignored=0
admin-GOAD-DC02            : ok=65   changed=24   unreachable=0    failed=0    skipped=49   rescued=0    ignored=0
admin-GOAD-DC03            : ok=62   changed=23   unreachable=0    failed=0    skipped=52   rescued=0    ignored=0
admin-GOAD-SRV02           : ok=65   changed=24   unreachable=0    failed=0    skipped=49   rescued=0    ignored=0
admin-GOAD-SRV03           : ok=65   changed=24   unreachable=0    failed=0    skipped=49   rescued=0    ignored=0
admin-kali                 : ok=18   changed=9    unreachable=0    failed=0    skipped=37   rescued=0    ignored=0
admin-router-debian11-x64  : ok=67   changed=42   unreachable=0    failed=0    skipped=50   rescued=0    ignored=0
localhost                  : ok=114  changed=47   unreachable=0    failed=0    skipped=31   rescued=0    ignored=0
burt@ludus:~/ludus$ ludus testing update -n admin-GOAD-SRV02
[INFO]  Update process started
burt@ludus:~/ludus$ ludus range logs -f
PLAY RECAP *********************************************************************
admin-GOAD-SRV02           : ok=8    changed=5    unreachable=0    failed=0    skipped=0    rescued=0    ignored=0
localhost                  : ok=3    changed=0    unreachable=0    failed=0    skipped=0    rescued=0    ignored=0
After this there were just a few minor configuration tweaks to the config file, and Ansible was kicked off. The server itself automatically brought up a wg0 WireGuard interface to serve as an entrypoint into the range network, but you can also grab a copy of a WireGuard config file so you can connect into the network from another machine.
burt@ludus:~/GOAD/ansible$ ludus user wireguard --user admin --url https://127.0.0.1:8081 | tee ludus.conf
[Interface]
PrivateKey = <SNIP>
Address = 198.51.100.2/32

[Peer]
PublicKey = 9FKXfOZnuslYB/Of6uVIMfyy3nfYuhzuWogpgAZR0h0=
Endpoint = 192.168.2.186:51820
AllowedIPs = 10.2.0.0/16, 198.51.100.1/32
PersistentKeepalive = 25
Finally the GOAD Ansible playbooks finished!
PLAY RECAP ********************************************************************************************************************************************
dc01                       : ok=2    changed=1    unreachable=0    failed=0    skipped=0    rescued=0    ignored=0
dc02                       : ok=2    changed=1    unreachable=0    failed=0    skipped=0    rescued=0    ignored=0
dc03                       : ok=2    changed=1    unreachable=0    failed=0    skipped=0    rescued=0    ignored=0
srv02                      : ok=2    changed=1    unreachable=0    failed=0    skipped=0    rescued=0    ignored=0
srv03                      : ok=2    changed=1    unreachable=0    failed=0    skipped=0    rescued=0    ignored=0

[✓] Command successfully executed
[✓] your lab : GOAD is successfully setup ! have fun ;)
Build in 68 minutes and 8 seconds.
Even though the point of the network is to hack your way in, you can still troubleshoot easily via RDP by downloading all the .rdp files into a ZIP archive.
burt@ludus:~/GOAD/ansible$ ludus range rdp
[INFO]  File downloaded and saved as rdp.zip
burt@ludus:~/GOAD/ansible$
Let’s list out the range details.
burt@ludus:~$ ludus range list
+---------+---------------+------------------+---------------+-------------------+-----------------+
| USER ID | RANGE NETWORK | LAST DEPLOYMENT  | NUMBER OF VMS | DEPLOYMENT STATUS | TESTING ENABLED |
+---------+---------------+------------------+---------------+-------------------+-----------------+
|  admin  |  10.2.0.0/16  | 2024-11-26 21:54 |       7       |      SUCCESS      |      FALSE      |
+---------+---------------+------------------+---------------+-------------------+-----------------+
+------------+---------------------------+-------+-------------+
| PROXMOX ID |          VM NAME          | POWER |     IP      |
+------------+---------------------------+-------+-------------+
|    107     | admin-router-debian11-x64 |  On   | 10.2.10.254 |
|    108     | admin-GOAD-DC01           |  On   | 10.2.10.10  |
|    109     | admin-GOAD-DC02           |  On   | 10.2.10.11  |
|    110     | admin-GOAD-DC03           |  On   | 10.2.10.12  |
|    111     | admin-GOAD-SRV02          |  On   | 10.2.10.22  |
|    112     | admin-GOAD-SRV03          |  On   | 10.2.10.23  |
|    113     | admin-kali                |  On   | 10.2.10.99  |
+------------+---------------------------+-------+-------------+
burt@ludus:~$
Isn’t that awesome? The GOAD config even included an attack box.
burt@ludus:~$ ssh kali@10.2.10.99
The authenticity of host '10.2.10.99 (10.2.10.99)' can't be established.
ED25519 key fingerprint is SHA256:7O61QSIYigzL0vRxGe391Zpir/p4QZ8app8ojdGpc0s.
This key is not known by any other names.
Are you sure you want to continue connecting (yes/no/[fingerprint])? yes
Warning: Permanently added '10.2.10.99' (ED25519) to the list of known hosts.
kali@10.2.10.99's password:
Linux admin-kali 6.11.2-amd64 #1 SMP PREEMPT_DYNAMIC Kali 6.11.2-1kali1 (2024-10-15) x86_64

The programs included with the Kali GNU/Linux system are free software;
the exact distribution terms for each program are described in the
individual files in /usr/share/doc/*/copyright.

Kali GNU/Linux comes with ABSOLUTELY NO WARRANTY, to the extent
permitted by applicable law.
Last login: Tue Nov 26 21:05:34 2024 from 192.0.2.254
┏━(Message from Kali developers)
┃
┃ This is a minimal installation of Kali Linux, you likely
┃ want to install supplementary tools. Learn how:
┃ ⇒ https://www.kali.org/docs/troubleshooting/common-minimum-setup/
┃
┗━(Run: “touch ~/.hushlogin” to hide this message)
┌──(kali㉿admin-kali)-[~]
└─$
In addition to GOAD, the Ludus project also has guides for setting up some other popular projects/labs. Check them out here.
Now that this environment is set up, I’ll be posting my exploration of it soon!
